Data Formatting
Pre-requisites: Intro to Spatial Data, Data Collection
Objectives:
- Understanding how to wrangle or prepare your data
- Recognize common methods to sptail data wrangling
Data Formatting
Data manipulation can be a simple endeavour if the data inputs come in the same or compatible formats. Data sources will usually have a specific format they use for their data which can make it easy to use work with their datasets. Unfortunately, when we gather data from various sources, we are usually given several different formats to data to deal with. Data wrangling is the process of manipulating and reformatting disparate data sources into compatible datasets. Data wrangling makes proper analysis/modeling possible. There are several methods common to spatial data wrangling some of which are:
- Reprojection - Conversion from one projection coordinate system to another
- Rasterization/Vectorization - Conversion from raster dataset to vector and vice versa
- Extent Definition - Delineates the bounding box for a dataset, all data outside the box will become null
- Reclassification - Assigns categorical values to a field based on a the contained values
- Spatial Joins - Merges datasets based on spatial proximity/overlay
These methods can be performed using a variety of tools depending on the specific needs of the dataset. Here are a few typical choices to aide in data wrangling:
Exercise
- Set project projection to EPSG:2927
Before starting any project in a GIS program, you should first set the project projection to make sure your data comes in with the same extent.
If you don’t set the project’s projection, the program will use the projection of the first layer added or EPSG:4326.
You can set the projection with the following steps:
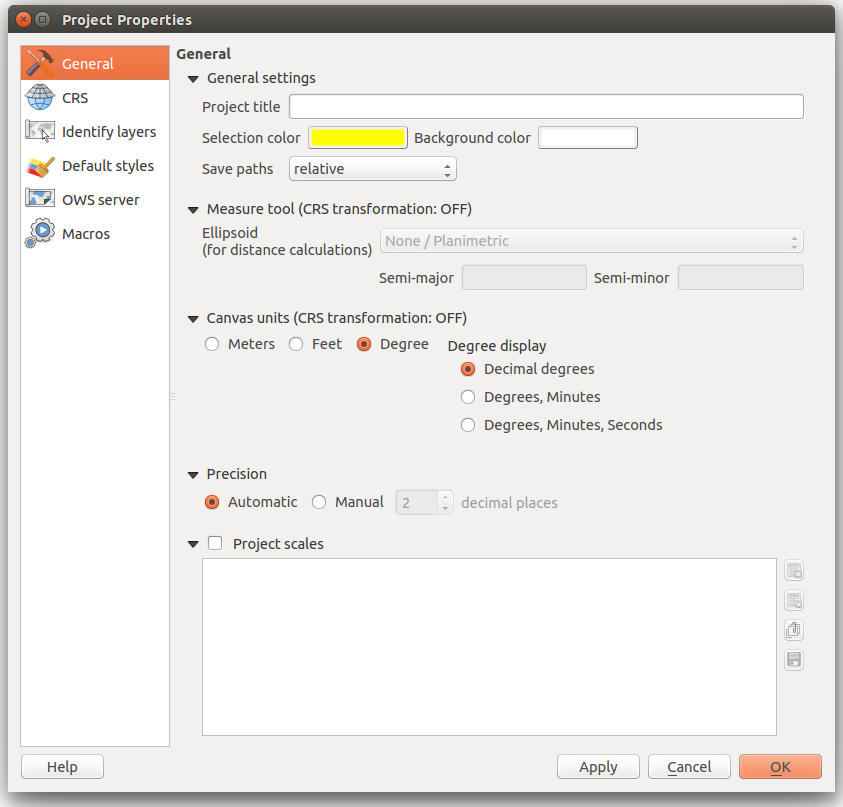
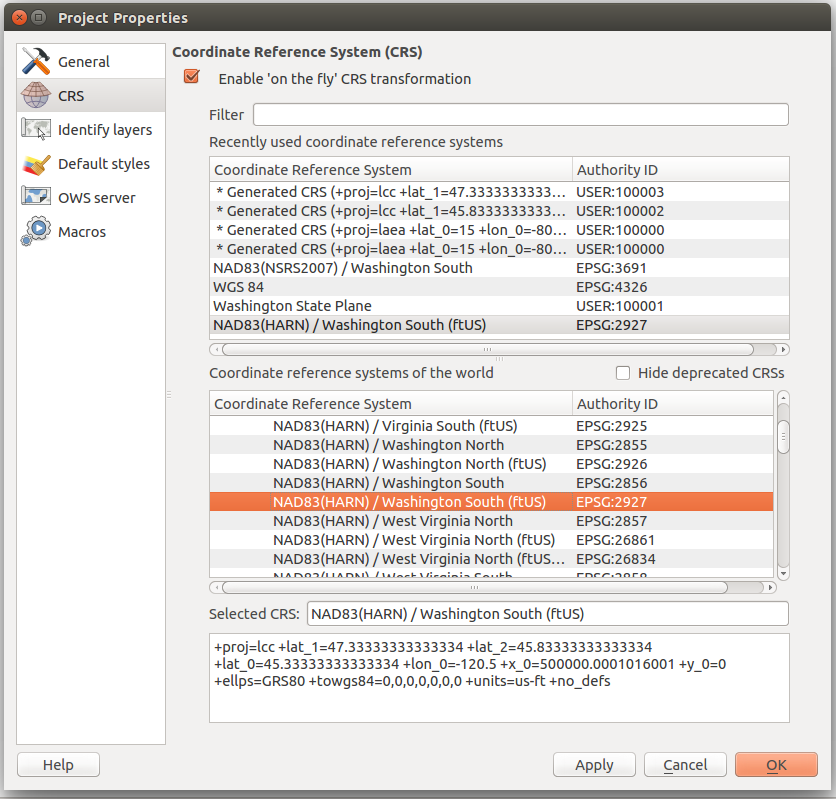
- In the top navbar go Project > Project Properties
- Select CRS in the Left menu
- Check Enable On-the-fly CRS transformation
- Using the Filter, search 2927 and select NAD83(HARN)/Washington South(ftUS) EPSG:2927 from the List of Projections.
- Apply and OK to save changes.
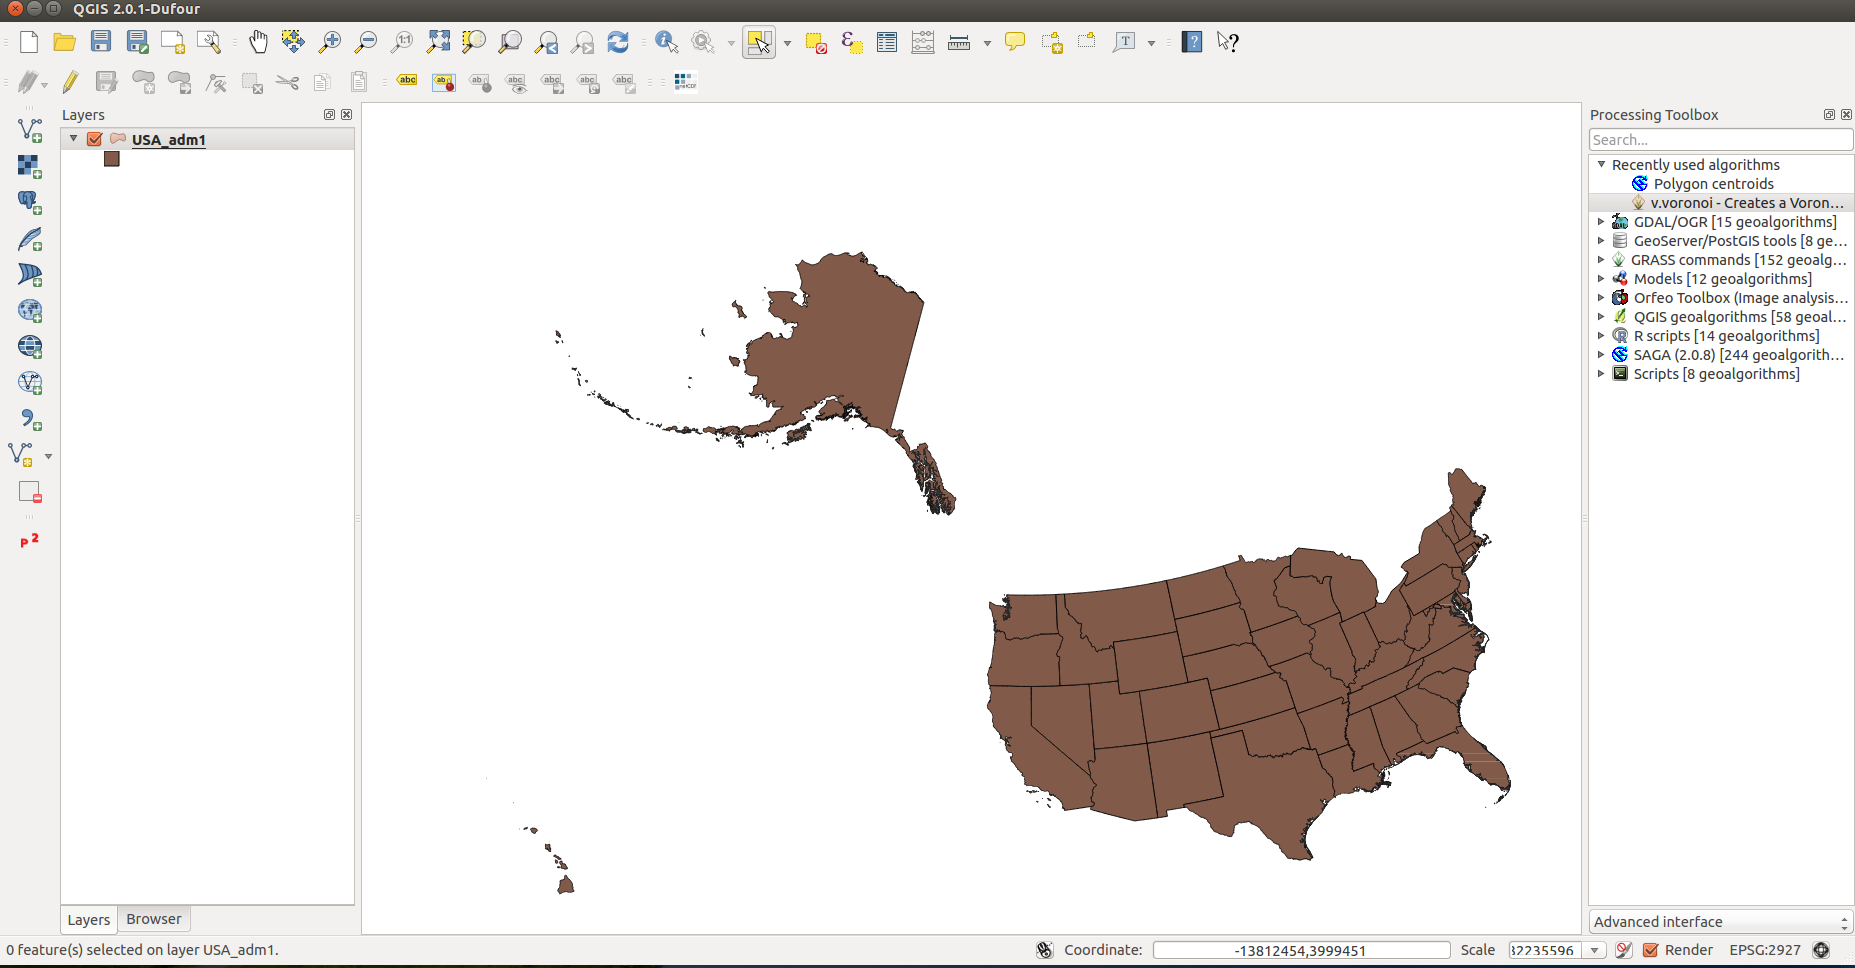
- Add the US States shapefile
Since our project is directed at the state of Washington. We should extract the Washington state boundary for our study. The GADM[^7] project provides high-quality boundary data on country,state and county levels. We can use the US-state level dataset to get the Washington boundary.
- Select Add Vector Layer in the left toolbar
- Browse to the USA_adm1.shp layer from the iPlant Data Store
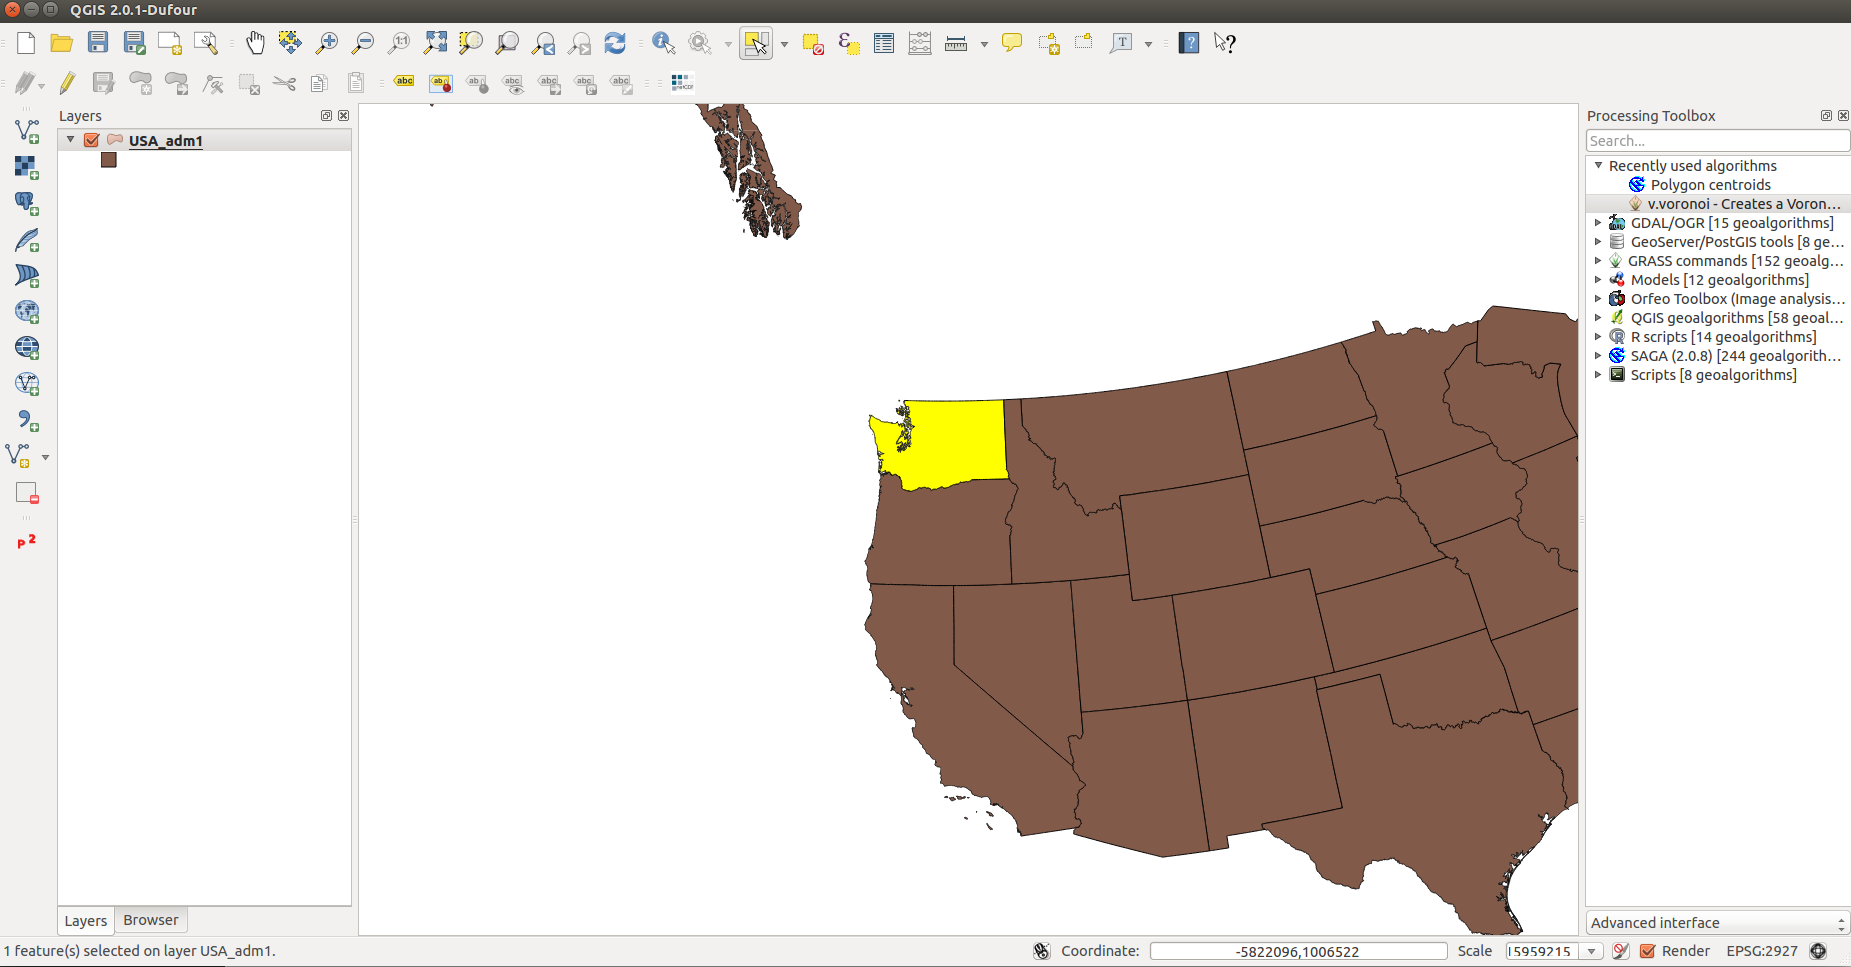
- Create a layer for the state of Washington
- Within the Layers List, click on USA_adm1 to activate layer tools.
- Select Single Feature tool:
Menu Bar > View > Select > Select Single Feature OR
in the top toolbar, select Select Single Feature - Click on the state of Washington to select it
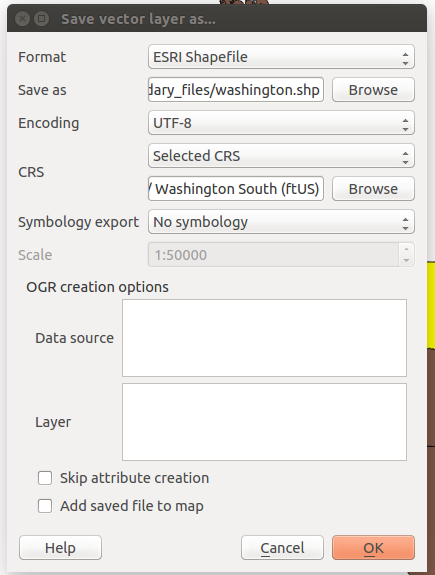
- Right click on the USA_adm1 layer and select Save Selection As…
- Format: ESRI Shapefile
- Save as: washington.shp
- Encoding: UTF-8
- CRS:
- Selected CRS
- Browse > NAD83(HARN)/Washington South (ftUS) EPSG:2927
- Load the new washington layer
- Select Add Vector Layer
- Browse to the new washington layer and click Open
- Remove the USA_adm1 layer from the project
Now that we have the Washington layer, we can get rid of the U.S. layer.
- Right click the layer in the table of contents
- Select Remove
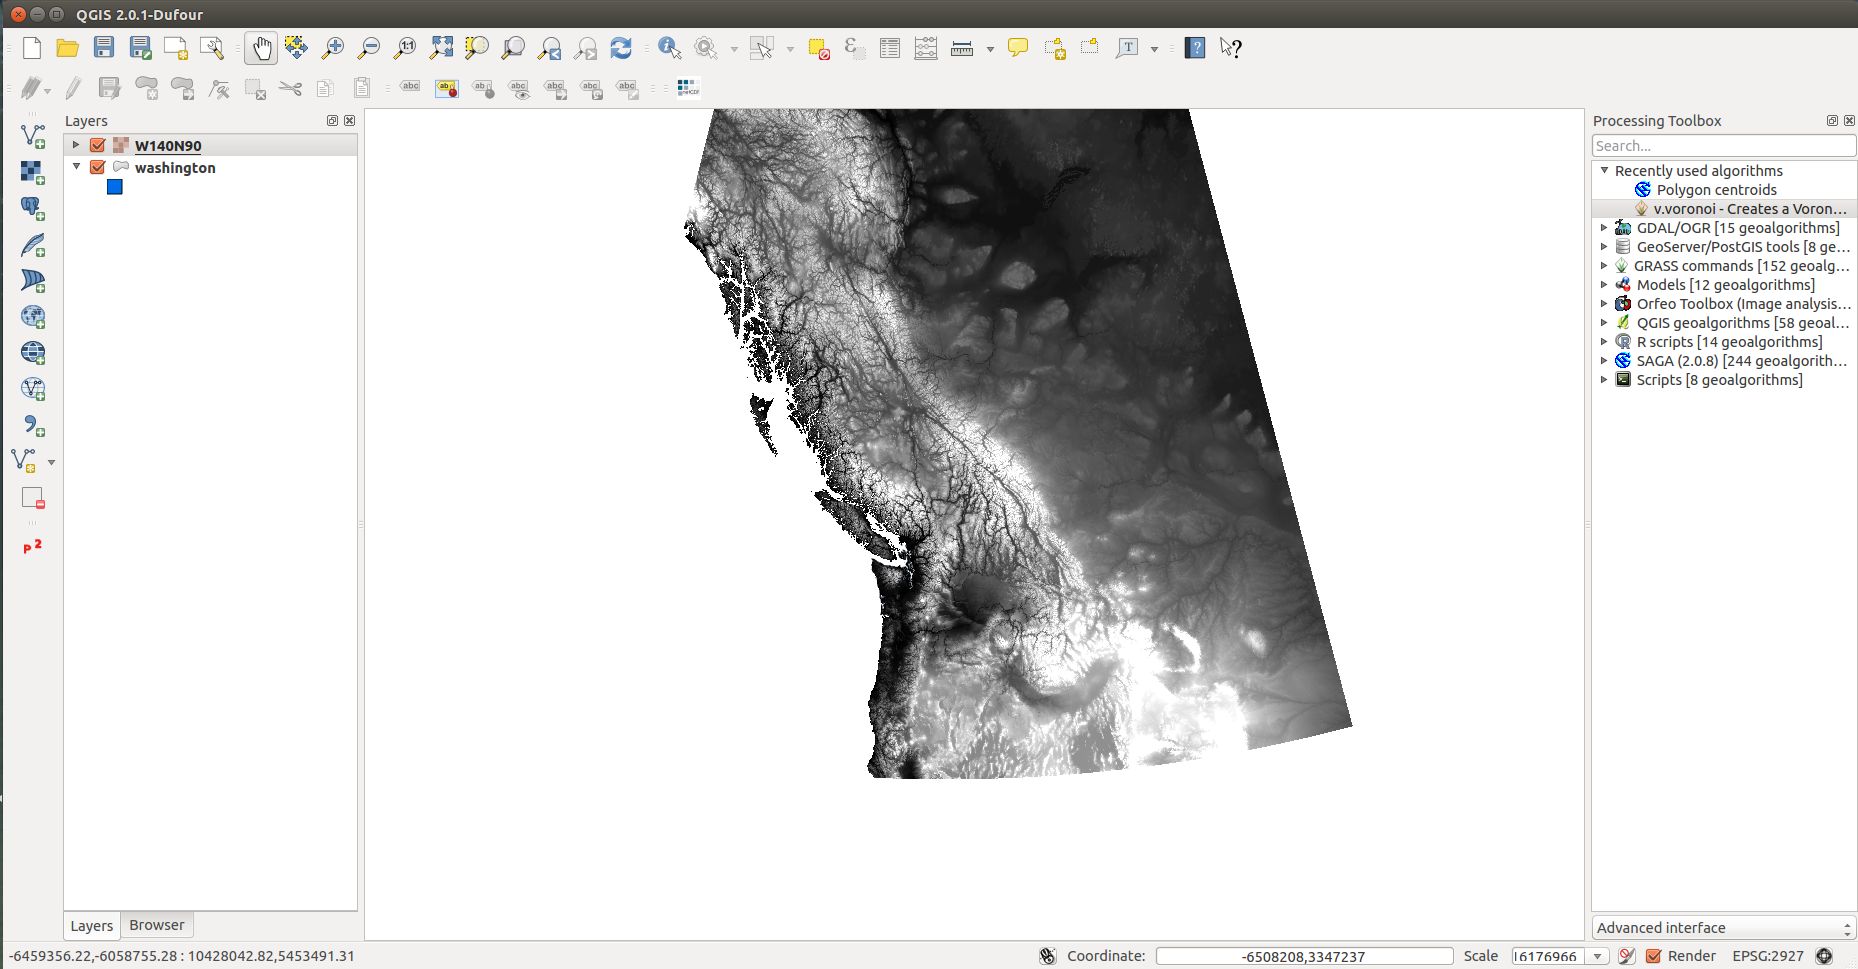
- Add the DEM layer from the iPlant data store
DEMs or Digital Elevation Models are very useful for establishing topological context in a map. DEMs generally come as a raster dataset that consists of elevation values. There are several different byproducts that can be created from DEMs.
This DEM was taken from the GTOPO30 satellite data.
- In the left toolbar, select Add Raster Layer
- Select source_files/W140N90.DEM
- Project the dem to EPSG:2927
- In the top menu, go to Raster > Projections > Warp (Reproject)
- Use the following options
- Input File: W140N90
- Output File: secondary_files/dem-project.tif
- Source SRS: EPSG:4326
- Target SRS: 2927
NOTE: When searching for an SRS, you MUST click on SRS in the bottom list otherwise you will not actually be selecting an SRS - Resampling Method: Near
- No data values: 0
- Be sure to click CLOSE and not OK when exiting tools. Clicking OK will rerun the tool.

- Important! Save you current project workspace in your project directory. Saving will maintain the configuration of your project workspace. You will be using this project workspace for the following lessons.